A little while back I had a previous client request a second modeling session with me for some work she was doing at the time. Chloe is a model and opera singer and wanted some additional images for her modeling portfolio. On our first shoot, we focused on her call card for opera auditions and did a lot of meticulous light set ups to give her a headshot that matched her stage presence. (I will post some images from that session in the near future)
One thing I wanted to do on this shoot was get some outdoor/urban shots of Chloe and though I love shooting downtown, this particular day did not provide the weather I preferred. There was already a lot of indirect light with all of the building cover, but this day was also overcast. This provided for decent natural light shots but I wanted to get a few more dramatically lit shots as well.
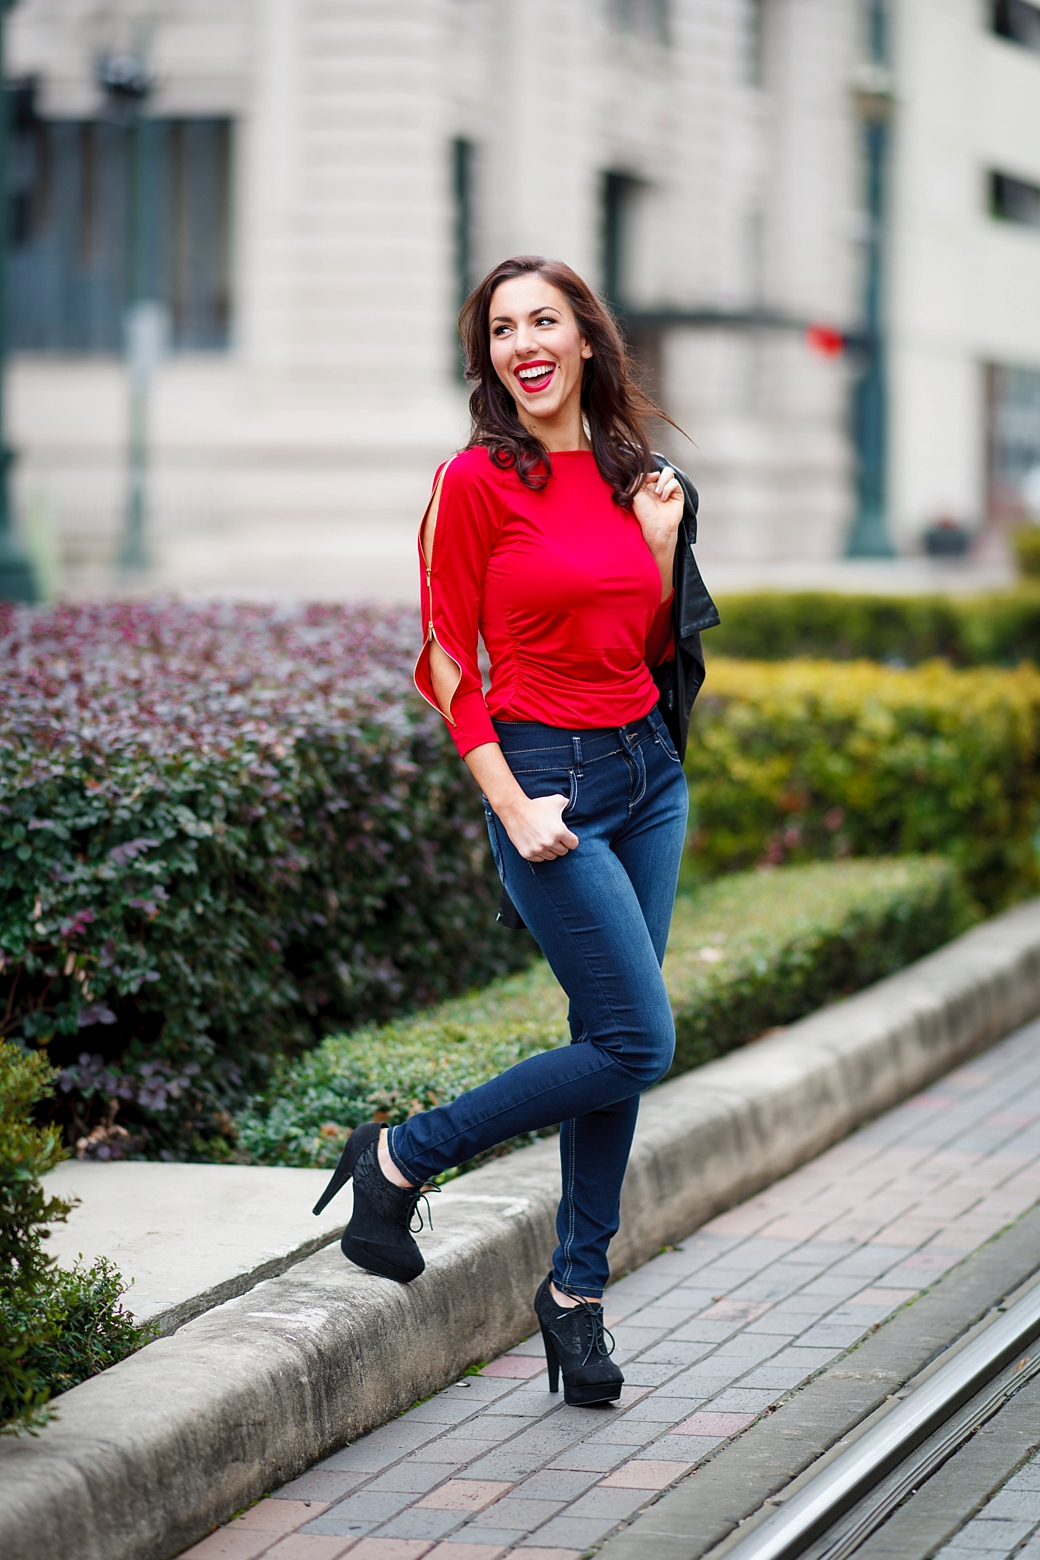
The image above was an example of the type of light that was produced from the overcast and indirect light bouncing off all of the buildings in downtown. It makes for amazingly soft lighting, but it was also coming mostly from above. This required me to turn Chloe’s head up and towards the light to be able to control the direction that the light was hitting her face. Not difficult at all, but I didn’t want all of my shots to be with her looking up into the sky. Also, exposing for Chloe meant the the (brighter) background became overexposed. This look works some times, but it wasn’t what I was going for in this particular framing.
The ambient light in this image was lighting the background AND my subject. By adding a single speed light, I was able to make it (the speed light) my main light source and completely change the look of the image. This allowed me to utilize the ambient lighting as my second source of light. I added one speed light (in a 24″ soft box) just off camera left and focused it on Chloe. This gave me a pretty clean image that allowed me to more properly expose the background and control the direction that the light landed on the her.
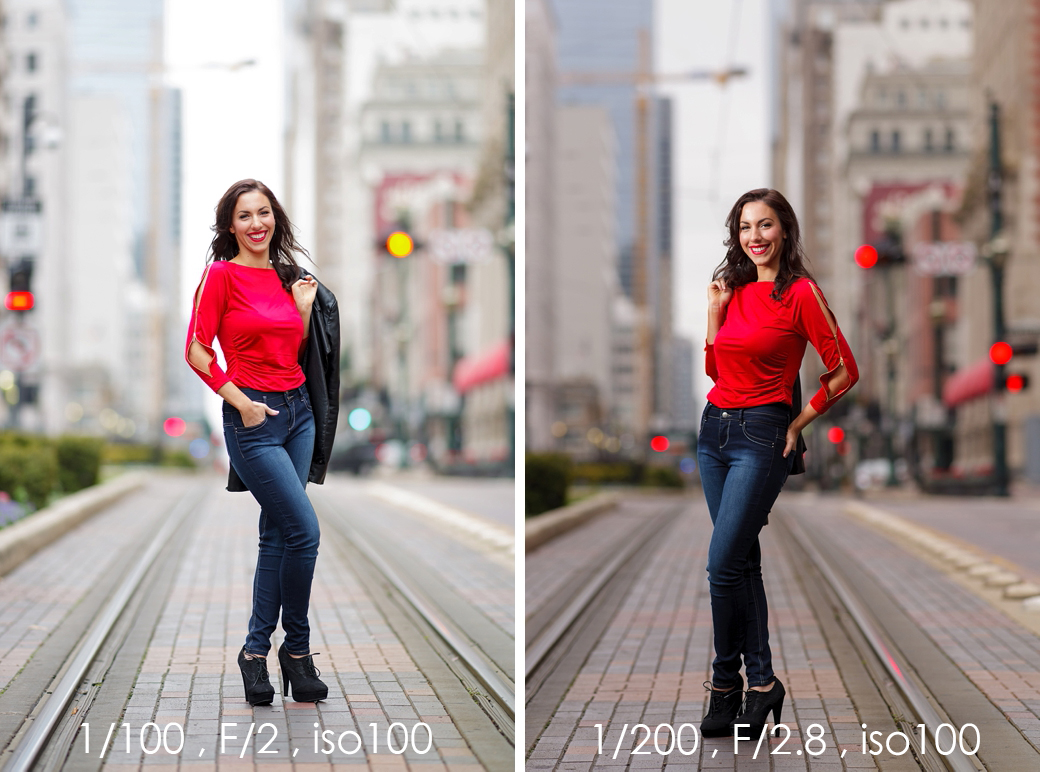
In the above (left) image I exposed for Chloe. In the above (right) I exposed for the background and added my light. Exposing for the background in the second image led to a 2 stop lower exposure (darker), which made Chloe too dark. I wish I would have saved an image of her before adding the light, but you can see how much darker she was at her feet and on her left side of her face. The light only needed to be adjusted to light her, which took only a second (which was good because we were standing on the metro rail tracks).
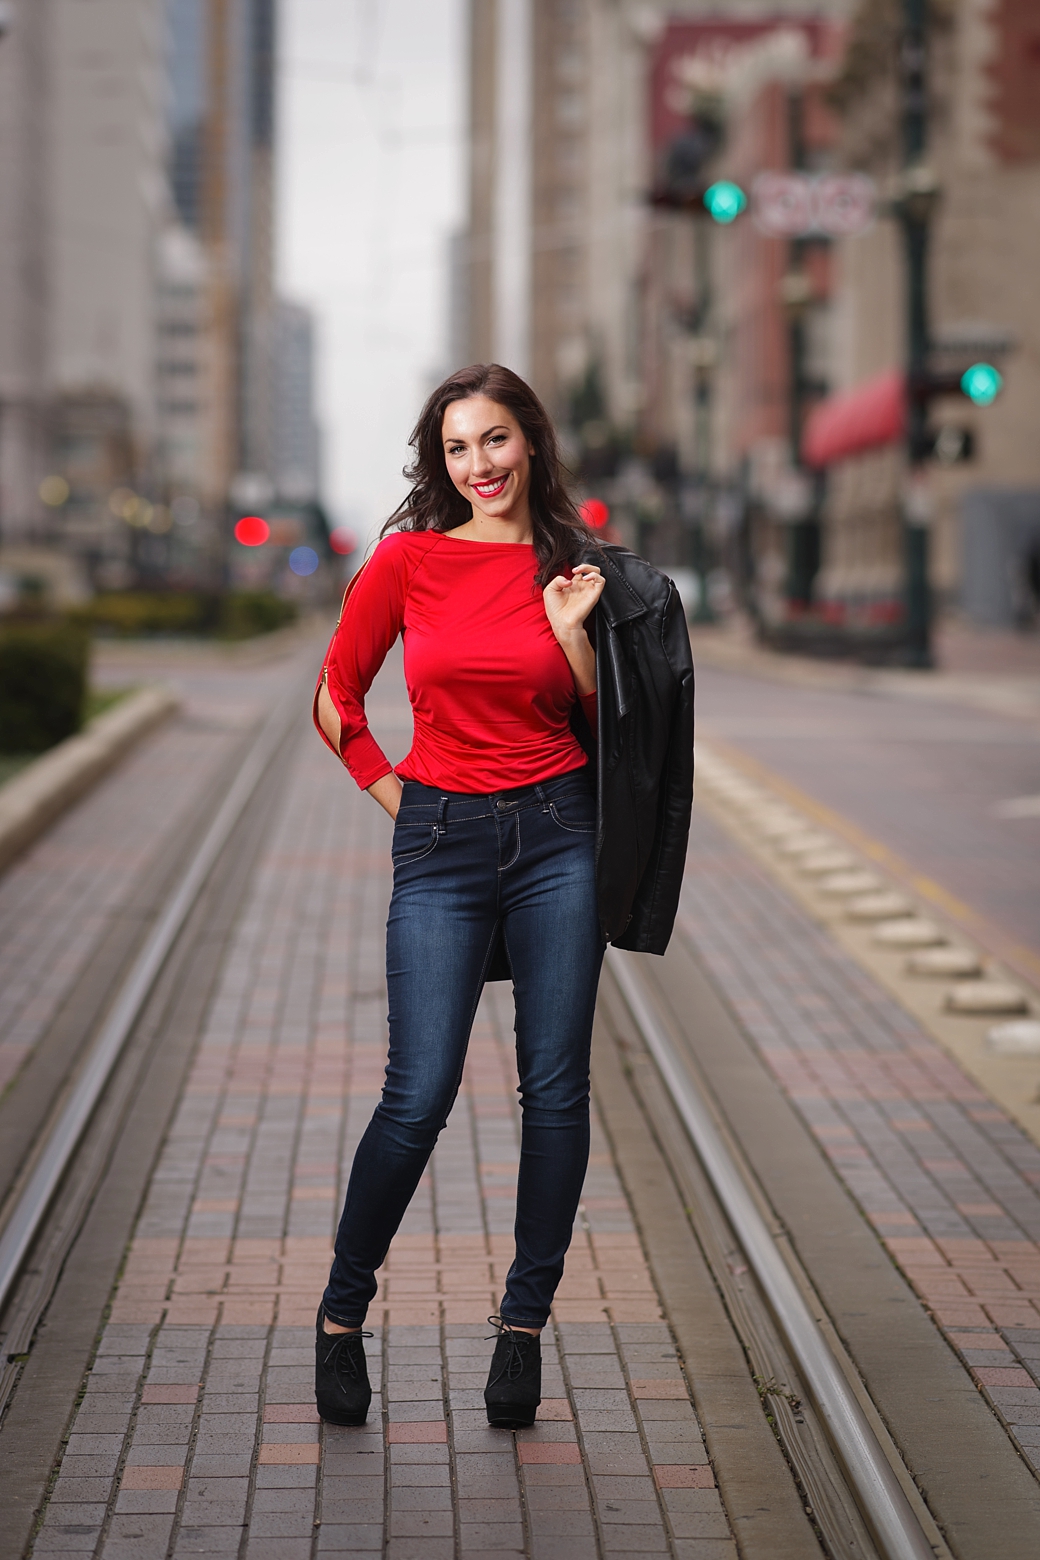
Below was the shot that I was going for and couldn’t have been accomplished with natural light, alone. Adding a single speed light was required, and very simple.
Additionally, adding a single light doesn’t HAVE to always be a speed light. It can be any additional item that is contributing light to your scene/subject. In the following image, the windows were my main light source but because of how dark the room was on this overcast day, there was a pretty significant fall off from the bright window (right) to the dark room (left). Adding a single white reflector helped bounce back some of that window light and prevent her from being so dark on the left portion of the image. This could be accomplished with the reflector, a light, or anything that contributed light to the scene.

Don’t ever get comfortable in photography. Always try new things and with every client you work with, take a few shots for you. Sure, the client wants the images and the look they are paying you for but it doesn’t take much time to try a few new things on each session. You may end up changing your mind on what you think you like and learning something new.
Both images were taken with a Sony Zeiss 135mm f/1.8.