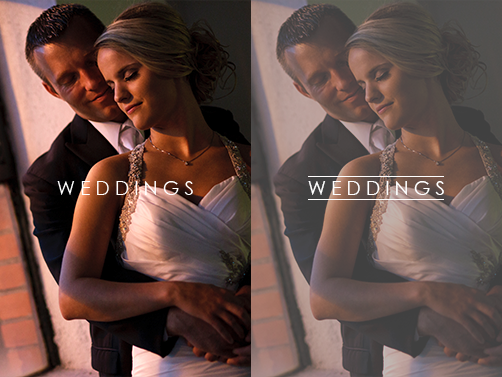
One thing that can help boost your professional photography business is learning how to take a good headshot. Business professionals are always looking to update their headshots for social media, websites, and job searches. Being able to accommodate clients with these requests will help provide an easy source of income with a relatively low turn around time.
Although headshots can be done outdoors or in “natural” light, my experience has shown that most business headshot clients are looking for a studio setting. “Studio” can be a number of things but for me I associate this sort of shot as a very controlled environment. Many photographers shy away from studio work due to limited equipment or the lack of a studio setting. However, you will see in this post that the equipment/environment needed is of little consequence in comparison to your technique.
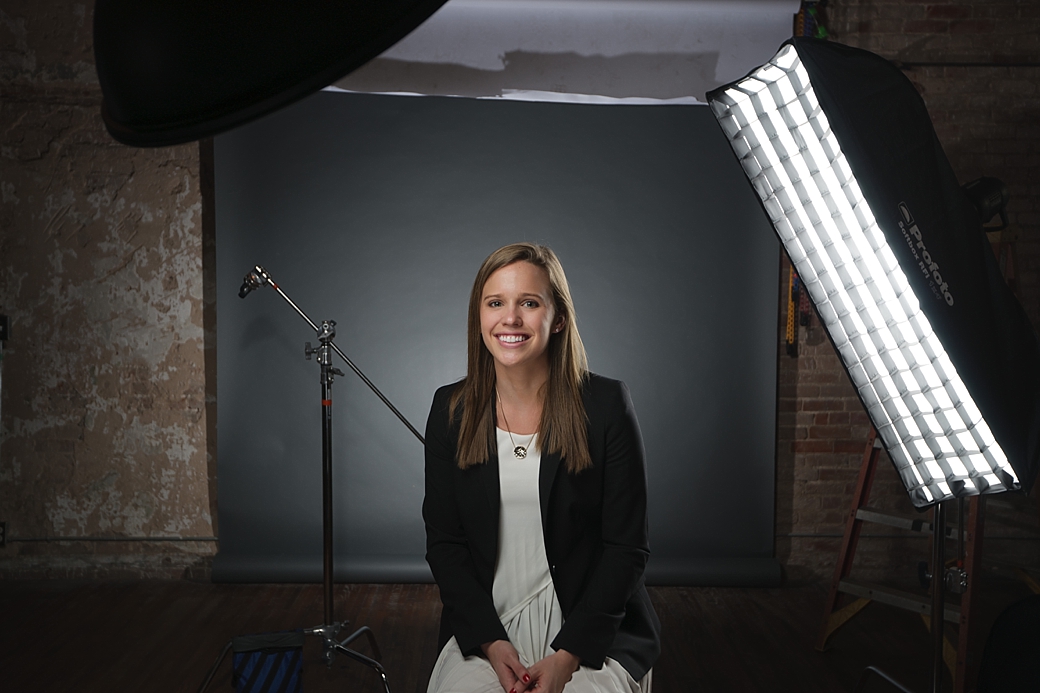
As you will see in the above image, Natalie was sitting in our studio (TheHoustonStudio) and the environment was of little impact other than the backdrop. Most backdrops are inexpensive OR can be substituted with any simple/solid surface. The color I typically choose is a variation of gray simply because I find it to be more versatile than other colors. Meaning, I can apply more light (make it white), or less light (make it black), or apply a colored gel (add color) to get more use out of it than any other colored backdrop.
It seems natural to want to set up your first light as your “key” light (or main light), but I find it much more difficult to see exactly what each light is applying to a scene when I do it this way. I try to establish each light, one at a time and independently of one another to know EXACTLY what it is contributing to the final image.
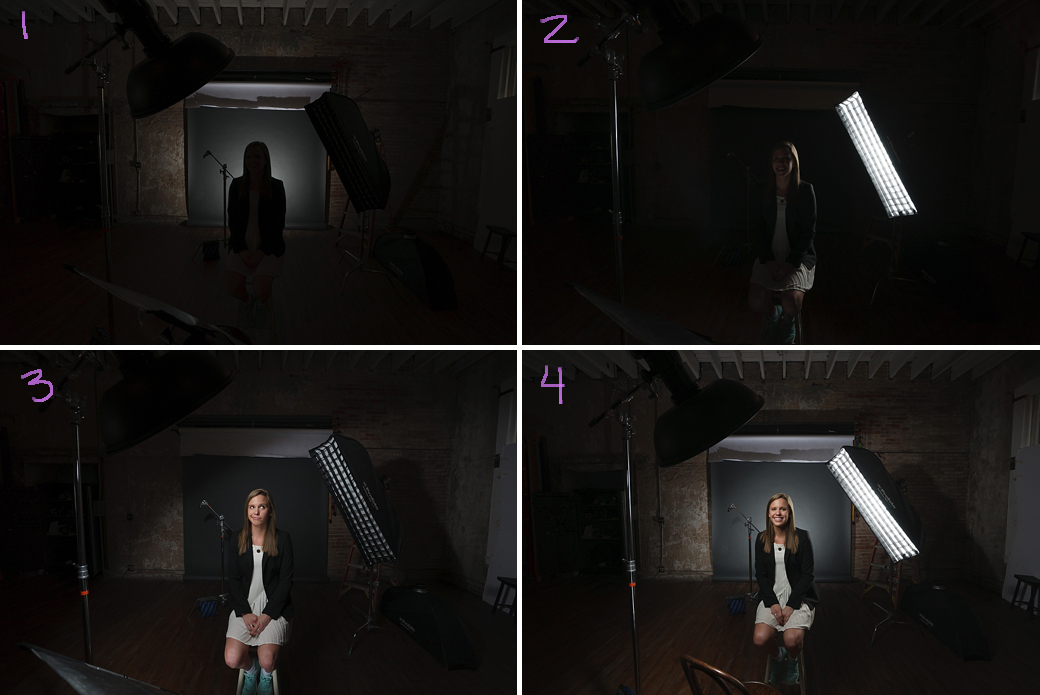
- Below you will see that I set up my background light first. This was a simple ProFoto B1 (bare) that was pointed at the backdrop and placed only a few feet away. This gave a “halo” effect of glow that appeared to illuminate from behind my client.
- Next, I chose to apply a single ProFoto B1 (1×4′ gridded stripbox) that was off to my camera’s right (client’s left). I wanted this light to be across from where I planned on having my main light. I do this to add a little dimension. I place my kicker/side lights in a specific manner and I will discuss this in more detail, later.
- My “key” light or main light was a ProFoto B1 (Softlight Reflector) that I placed opposite of my strip box. I find it to be a little flat to place both lights on the same side of the subject. I also face my client towards the main light and adjust to acquire a typical portrait lighting setup (IE: Butterfly, Broad, Short, Split, Rembrandt, or Loop).
- My last light was actually a reflector that you can see in the bottom of the frame of image three. It contributed a decent amount of fill to Natalie’s neck area and lifted some of the shadowing caused by the high placed main light.
At this point, you’re probably wondering how one can do all this with limited lighting. Every light you add should be in addition to your “key” light (placement is most important). What I mean is, start with your key light if you only have one light. If you have two, add a background OR side light. Three lights? Do what I have done here and remember that adding a reflector is VERY effective as substituting for another light.
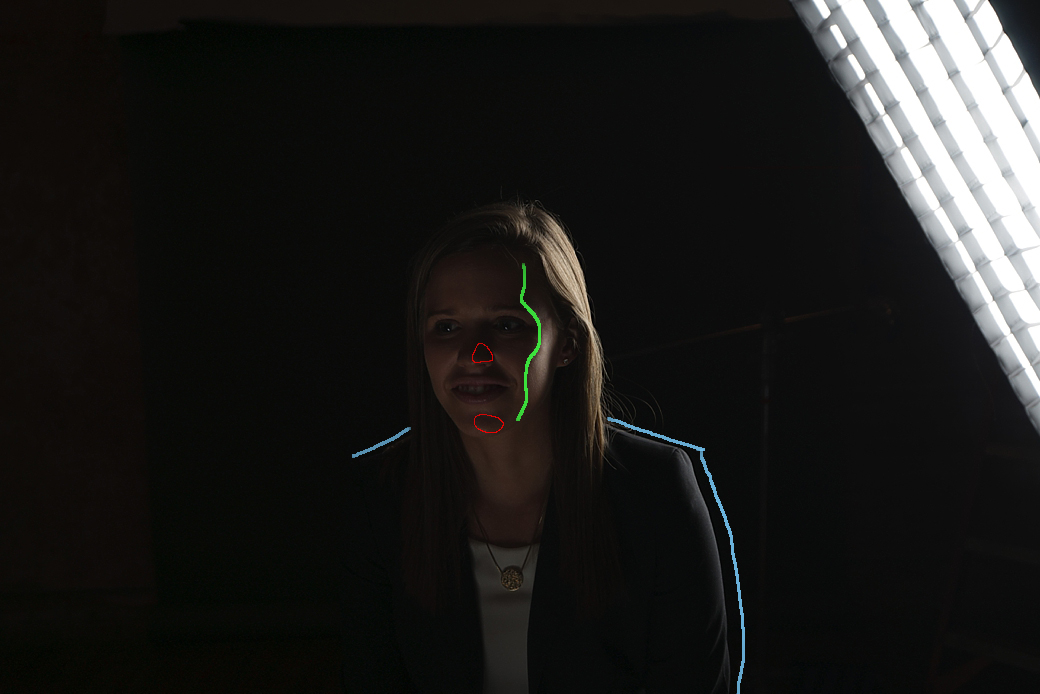
As I previously mentioned, I am typically a little particular as to where I place my side/kicker/highlight light (whatever you wish to call it). The most important rule (for me) is that I place the light high enough (still aimed at the subject) that it doesn’t cause the shoulders to cast a shadow on the subject’s face. Additionally, I want it far enough behind that the light isn’t hitting the subject’s nose and chin. I only want the light to highlight the shoulders, side/top of head, and arms’ sides. You can see in the image above that I have a slight highlight on Natalie’s jacket, her hair, and side of her face. Lastly, there is no side light contributing to lighting her nose, lips or chin. Last, you can see how the reflector (that was placed below her and aimed up at her face) is providing some very subtle fill.

In the end I was able to quickly get some great business shots of Natalie with a very simple setup. The image in the above/left is an example of the this setup. In the above/right, I removed the background light and was able to get a darker look. I also moved the side light to a more overhead position to help highlight her shoulders more and provide a little more separation from her dark jacket and the (now) darker background.
The final images were both shot with my Sony SLT-A99V, Carl Zeiss 85mm f/1.4, and the camera settings were
Shutter: 1/200 Aperture: f/4 ISO: 100 Focal Length: 85mm
I hope this light by light break down helps you with tackling future headshots. Please share and and like. If you have any questions, please feel free to ask!